Add-on View
Clicking the SHOPFLOOR menu item in the ribbon menu opens the add-on view in cxE. The add-on view is divided into three areas:
- Project treeThe project tree on the left shows the list of mounting rails and mounting plates you have configured in your cxE project. The project itself is the root element of the tree. Below the root, each mounting rail and plate is represented by a node. To view a specific mounting rail with its configured items in the 3D viewer (see below) and to start its production, select the node in the project tree.
- 3D viewerThe 3D viewer in the middle of the view shows the 3D representation of the mounting rail and its items selected in the project tree on the left (see the descriptions below for details). Clicking the Start Production button starts the production of the displayed mounting rail.
- Bill of materials The bill of materials (BOM) on the right lists all the items and assemblies required to manufacture the configured mounting rail. For each item in the BOM the article name, unique item number and quantity of the article required are given.You can use the ADD TO WORKBENCH button to go to the workbench and configure your workplace digital. See the topic "Workbench Configuration" for further details.
3D viewer
The 3D viewer allows you to use the mouse to rotate, zoom, and move the mounting rail.
| Operation | Mouse action | |
|---|---|---|
| Rotate the view | Drag the left mouse button. | |
| Zoom in and out of the view | Scroll the mouse wheel. | |
| Move the rail | Drag the right mouse button. |
Once you have started the production process by clicking the Start Production button in the view, the 3D viewer provides additional buttons shown at the bottom in the view that allow further actions.
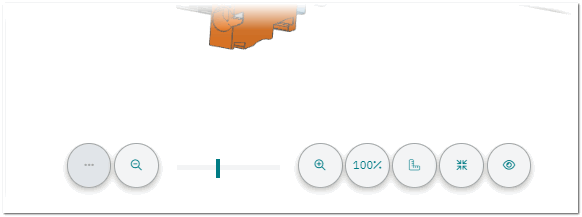
| Buttons | Description |
|---|---|
 | Zooms in or out of the view. You can also use the slider or mouse wheel to zoom in and out. |
 | Returns the view to 100% zoom, removes the rotation of the view and places the mounting rail in the middle of the view. |
 | Shows or hides the manufacturing distance in mm of the item that was added during the currently active process step. The manufacturing distance is measured from the left edge of the mounting rail to the position where the item is placed on the rail.
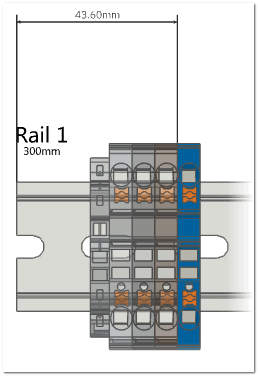 |
 | The item that was added during the currently active process step is lifted graphically from the mounting rail.
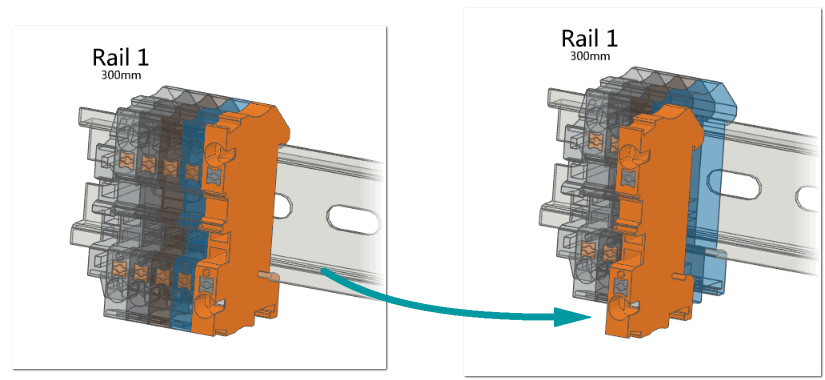 |
 | Shows the complete mounting rail with all added items as it will be manufactured. |