Configuring the Workbench
The add-on supports the use of a pick-by-light system (PBL). The PBL connected to clipx ENGINEER helps to reliably guide workers through the production (assembly) process. The workbench view implemented with the add-on allows you to set up your workplace (workbench) and digitally map the article locations. For instance, you can add and configure your racks by specifying the number of rows and columns in the rack and subsequently assign the articles used in your clipx ENGINEER project to the rack locations.
Based on the workbench configuration, the connected PBL system knows the storage compartments of the articles. During a production step, the PBL guides the worker to the respective storage compartment of the article by means of an LED light and shows the quantity of the article to be picked.
This topic contains the following sections:
Workbench view
The workbench view is opened when you click the ADD TO WORKBENCH button in the BOM at the bottom right of the add-on view. On the left, the view shows all articles with their name and item number that you have used in your clipx ENGINEER project. On the right, the rack as configured (number of columns and rows) and the articles assigned to the rack locations are shown.
| Note
Initially, there is no rack configured. Proceed as described in the following section to add and configure your racks. |
Adding and configuring a rack / Setting up the workbench
| Note
A driver is required to connect the PBL system to clipx ENGINEER. clipx ENGINEER currently only supports the pick-by-light system from ix.tech. You have to create the IxTech driver prior to adding and configuring the rack (see the section below). |
Proceed as follows:
- Open the workbench view by clicking the ADD TO WORKBENCH button in the BOM at the bottom right of the add-on view.
- From the burger menu in the top-right corner, select the Add rack command.

- In the Add rack window, select the IxTech PBL system driver in the Driver dropdown list. If the dropdown list does not contain the IxTech driver, first create the driver as described in the following section.Enter the rack parameters such as the rack name, the number of columns and rows of your rack, the start index and start position, etc.
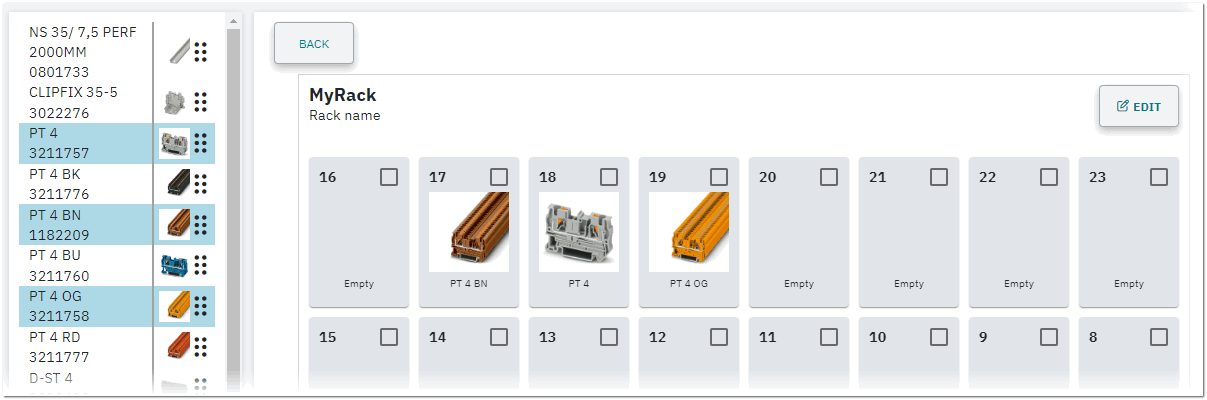
- Click SAVE to save the settings. The configured rack is shown in the workbench view (see the example below). Each storage compartment of the rack has a checkbox. By activating the checkbox, the LED light of the corresponding compartment in the PBL is switched on.With the Pick by light command from the burger menu, you can switch the PBL on to see all LEDs.You can edit the rack parameters by clicking the EDIT button at the top right of the rack. Pressing the BACK button closes the workbench view and returns to the add-on view.
- Assign articles to the storage compartments.Drag the article from the article list on the left to the desired storage compartment. The article image is shown in the compartment. In the article list, articles that are assigned to a storage compartment are highlighted accordingly.
 To remove an article from a storage compartment, left-click the article, click the recycle bin icon and then the SAVE button.
 Example
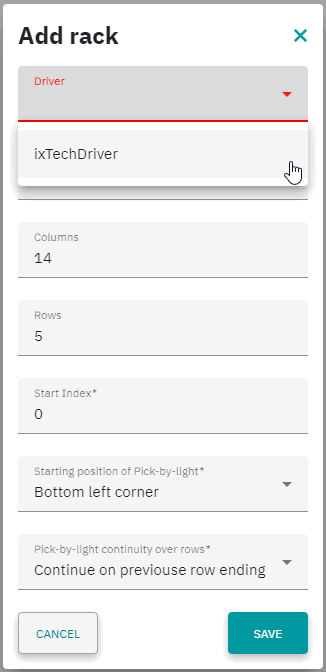

Creating the PBL driver
If there is no driver for the PBL system available for selection in the Driver dropdown list (see the section above), you have to create it as follows:
| Note
clipx ENGINEER currently only supports the pick-by-light system from ix.tech. Thus, the IxTech driver must be created to enable the connection to the PBL system. |
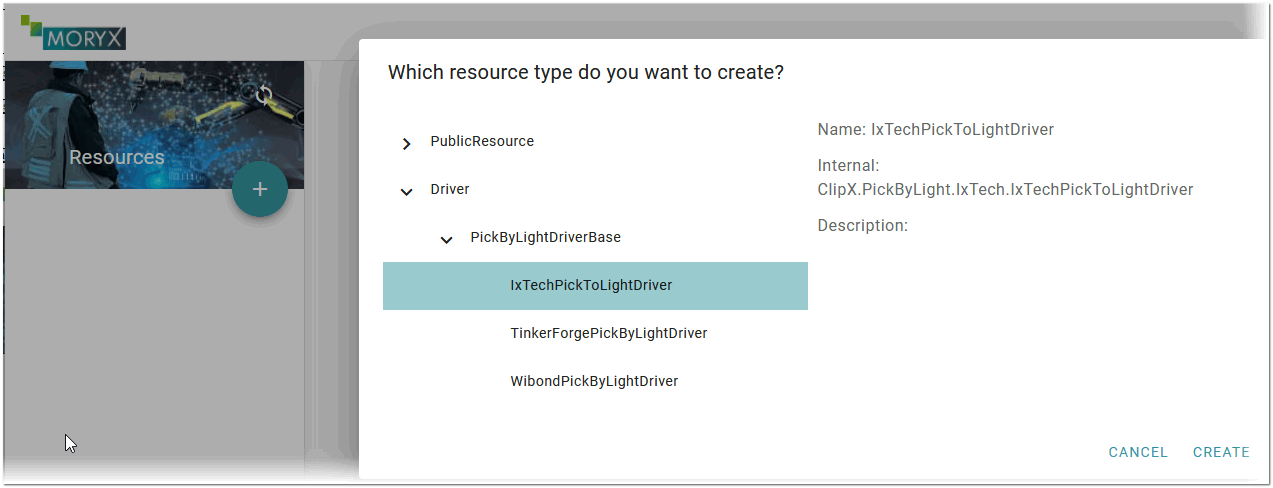
- From the burger menu in the top-right corner, select the Show drivers command.
- In the appearing browser window, click the + button on the left, select the IxTechPickToLightDriver in the appearing window if the driver is not yet created (as shown in the following example) and press CREATE.
- On the driver page, enter a driver name and optionally a description. In the IpAddress field, enter the IP address of your PBL system (as shown in the PBL driver software). In the Port field, enter port number 2000.
- Save the configuration by clicking the save button on the top-right in the browser window.