clipx ENGINEER Release Notes 2.4.1
This document describes the most important changes between versions 2.4 and 2.4.1 of the clipx ENGINEER software from Phoenix Contact (phoenixcontact.com/product/1272241).
The following new functions have been integrated:
ECAD interface wizard
Version 2.4.1 introduces the new ECAD import wizard in clipx ENGINEER, which guides users through the entire ECAD data import process. The wizard enables the structured import of XML files, e.g., from ECAD systems such as EPLAN.
The individual steps of the import are clearly structured so that the user always retains control over settings and assignments. The wizard can be skipped at any time. In this case, the import is performed automatically using the predefined default settings without the user having to configure any further options. This keeps the import process flexible – either guided and detailed or quick and automatic.
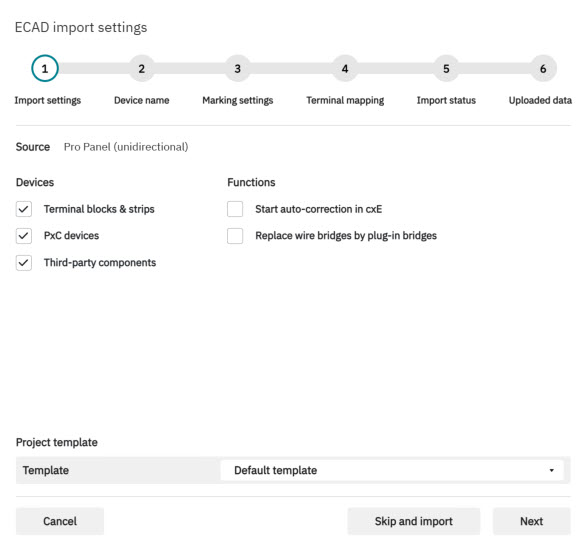
ECAD Import Wizard – Step 1: Import settings
In the first step of the ECAD Import Wizard, the user defines the basic import settings. First, the source of the data is displayed, for example, a unidirectional export from Pro Panel. Then, the user can select which device types from the ECAD file are to be transferred, including Phoenix Contact terminal blocks and terminal strips, PxC devices, and optional third-party items.
In addition, supporting functions can be activated, such as automatically starting auto-correction in clipx ENGINEER or replacing wire bridges with plug-in bridges.
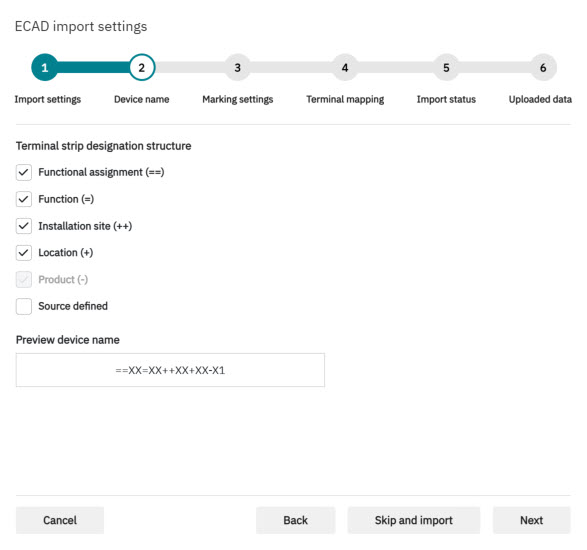
ECAD Import Wizard – Step 2: Device name
In the second step of the ECAD Import Wizard, the user defines the designation structure of the terminal strips. Various modules are available for this purpose. By activating or deactivating the respective components, the desired logic can be flexibly assembled. A preview shows what the resulting device name will look like. This ensures that the imported devices comply with the project-specific naming conventions and are consistently integrated into the existing structure.
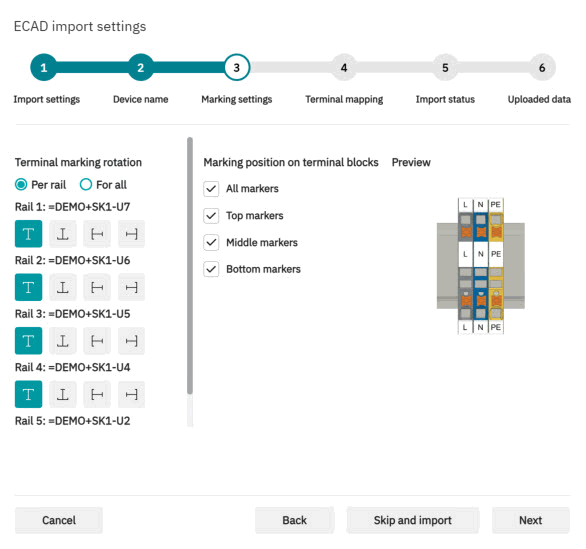
ECAD Import Wizard – Step 3: Marking settings
In the third step of the ECAD Import Wizard, the user specifies how the markings of the imported terminal blocks are to be displayed. To do this, a suitable project template can first be selected, whose predefined settings are automatically applied. The rotation of the terminal block markings can then be specified – either individually for each rail or uniformly for all. The desired alignment can be conveniently set for each individual rail using the options provided.
In addition, the user determines which marking levels are to be taken into account, such as upper, middle, or lower markers. An integrated preview shows at any time how the marking positions will look in the final project. This allows optimal control over the display and ensures that the imported data exactly meets the project-specific requirements.
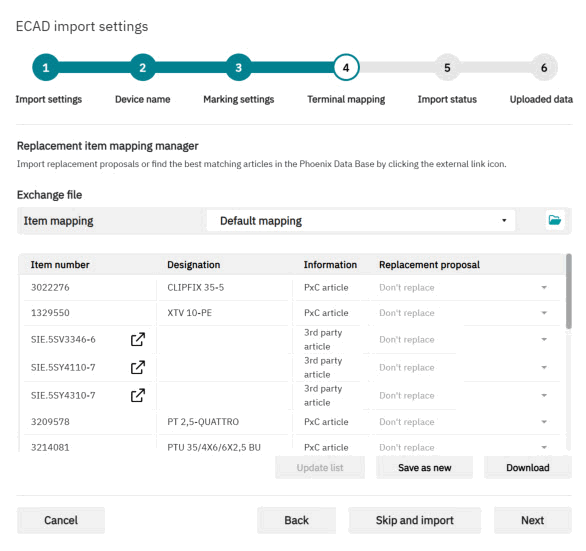
ECAD Import Wizard – Step 4: Terminal mapping
In the fourth step of the ECAD Import Wizard, the items contained in the import are assigned to matching Phoenix Contact items or optional replacement items. The Item Assignment Manager provides the user with a complete overview of all item numbers contained in the ECAD export. For each entry, the system indicates whether it is an identified Phoenix Contact item or a third-party item.
If necessary, the user can select specific replacement items for individual positions or load an existing exchange file that contains project- or customer-specific rules. The maintained assignments can be saved as a new exchange list or downloaded for further use. This ensures that already known or preferred replacement logic is automatically taken into account in the import process and that future imports run much more efficiently.
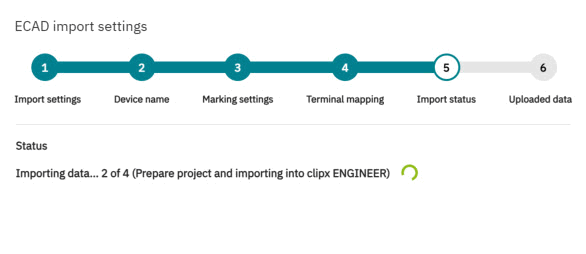
ECAD Import Wizard – Step 5: Import status
In the fifth step, the ECAD Import Wizard displays the current progress of the import process. While the data is being processed, a status message informs you which subtasks have already been completed, and which are still to follow. This typically includes preparing the project, transferring the structured ECAD data to the clipx ENGINEER environment, and applying the previously defined settings.
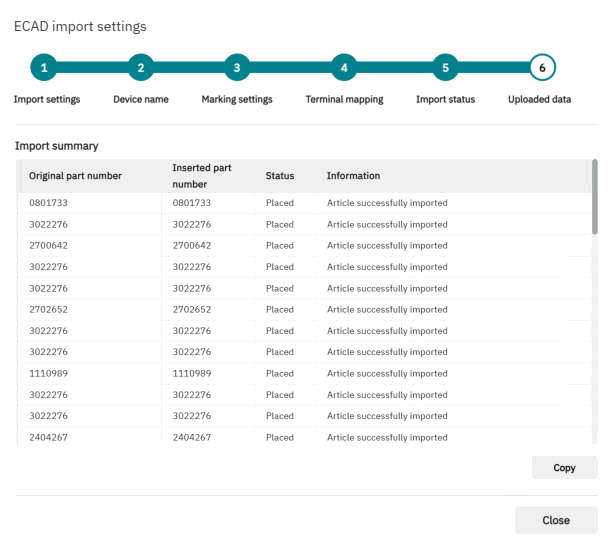
ECAD Import Wizard – Step 6: Uploaded data
In the sixth and final step, the ECAD Import Wizard clearly summarizes all imported data. The import summary displays both the original and inserted item numbers for each transferred component. In addition, the wizard shows the respective import status and additional information, such as whether an item was successfully imported or replaced by a substitute item. This transparent overview facilitates direct quality control of the import and helps users to immediately identify any anomalies. If necessary, the list can be copied in its entirety and reused for documentation or post-processing purposes. The wizard thus completes the import process in a structured manner and ensures that all transferred data is traceable and completely recorded.
New sample projects
Version 2.4.1 of clipx ENGINEER provides numerous new sample projects for setting up test-disconnect terminal blocks for measuring transducers. These projects serve as ready-to-use templates and help users efficiently plan standard-compliant and practical test and connection strips.
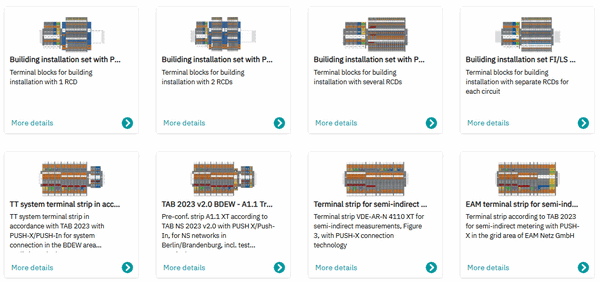
All new sample projects in clipx ENGINEER are structured in such a way that they already contain the correct connection principles, potential distributions, and test paths. Users can directly adopt and customize the templates and use them as a basis for their own applications. This significantly reduces planning effort and the risk of errors.
Further technical information on the measuring transducers and disconnect terminal blocks used can be found on the Phoenix Contact product page at: https://www.phoenixcontact.com/en-de/products/terminal-blocks/transformer-terminal-blocks.